Make a local multiplayer game in Godot
In this tutorial, you’ll make a simple platformer game that can be controlled by two players sharing the same keyboard. If you’ve ever played Fireboy and Watergirl, it’s a bit like that. Along the way, you’ll learn the basics of Godot, the same engine used to make games like Slay the Spire 2, Cassette Beasts, and YOMI Hustle.
- Ask your teammate and see if they can help
- Look up your problem on Google or Stack Overflow. If your problem is with Godot, check if there are any errors or warnings in the Debugger tab down the bottom.
- Ask in #support-channel to see if anyone else can help you. I'll do my best to respond to any questions!
Setup Godot, Hackatime, and GitHub
This video (5m) by the wonderful @tongyu will show you how to setup Godot Engine, Hackatime, and Git for your project.
You can add collaborators to your repository by going to Settings > Collaborators, and then invite your friend using their Github username, email address, or full name. They can then git clone <your repository url> to get the code on their computer.
How Godot works
A game in Godot is made up of Nodes. Each node has a specific job to do, like displaying an image, playing a sound, or detecting when something moves through it.

You can change the behaviour of nodes by adjusting their properties in the inspector tab, by extending them using scripts, or by adding other nodes as ‘children’ to form a scene. We’re gonna do all three in this guide!
A scene in Godot is just a collection of nodes. Scenes can be something like a player, a collectible, or a menu. Scenes work just like nodes, and you can add them to other scenes to make more complex scenes, like levels or menu screens. Let’s make our first scene!
Making the player
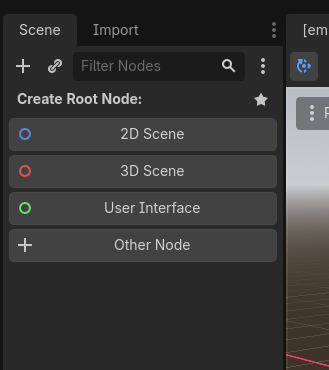
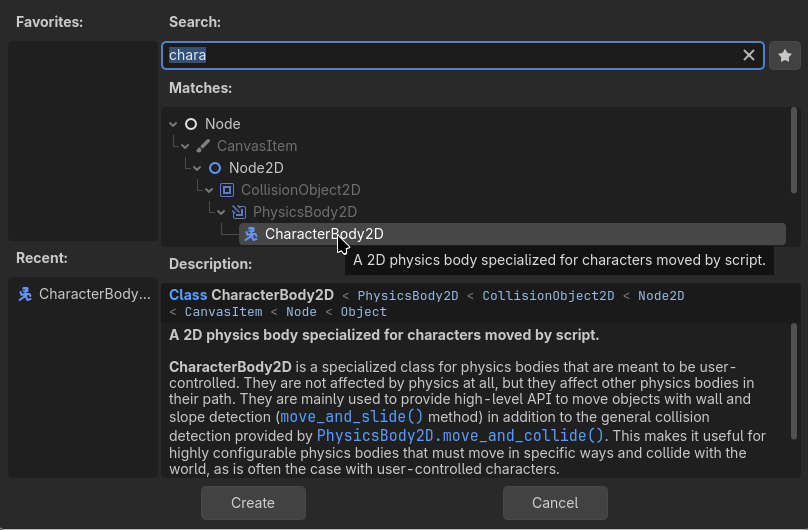
When you open Godot, the first thing you should see is an empty scene. If you’ve already been playing around with Godot, make a new scene by pressing Ctrl+N (Cmd+N on Mac). The first step is to choose the root node. This is the node that all the other child nodes will live under. When you move around a node, all it’s child nodes will move with it, so we’re gonna set the root node to whatever node will be moving around. In our case, we want a CharacterBody2D, which isn’t one of the preset options, so select ‘Other Node’ and search for CharacterBody2D.
If you double click on the node in the Scene tab you can rename it to ‘Player’. You might also notice the yellow warning symbol next to it. Godot shows these from time to time - if you hover over it with your cursor, you’ll see that it says the node has no shape.

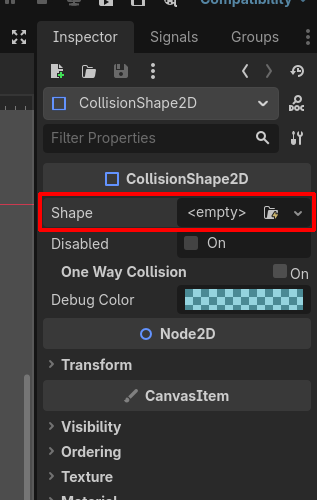
Collision objects like CharacterBody2D don’t have any shape of their own, so we need to add a CollisionShape2D node as a child to tell Godot what shape our player has. To add a child node, right click on the node you want to add the child to (in this case the player) and click Add Child Node. Add a CollisionShape2D node by right clicking on the node you want to be it’s parent..
You should see another warning pop up on the newly created node, asking you to create a shape resource. Resources are pieces of data like images, sounds, shapes, etc that nodes need to do their jobs. We can set the shape resource by editing the Shape property in the inspector pane on the right. If you click on the little drop down menu you can see a bunch of different shapes - I’m using a CapsuleShape2D because it gives the player a little bit of ‘grace’ when landing on platforms, but the choice is yours.
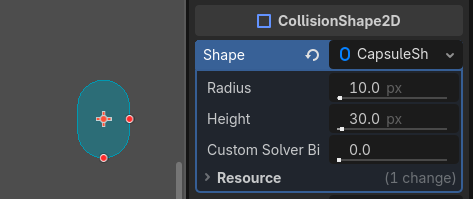
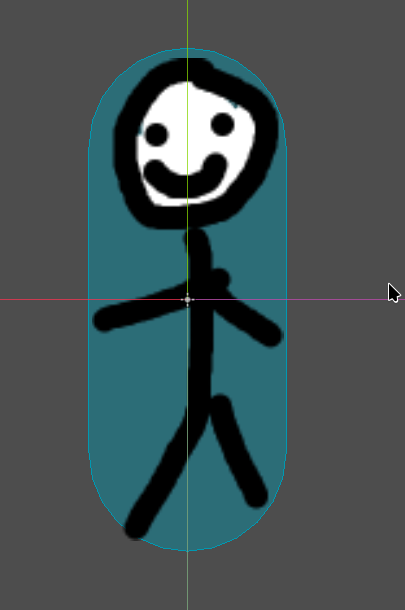
You should now see the shape in the main viewport area! If you move around the handles (red dots) you can adjust the shape. If you click on the CapsuleShape2D in the inspector, you can see that resources have properties of their own. Don’t worry too much about what values to put in right now, let’s first add in our player sprite and then match up the shape. Download this character sprite (or make/find your own) and drag it into the Godot window. You should be able to see it in the FileSystem tab. If you drag it from there into the main viewport area it should automagically create a Sprite2D. Center the sprite (like in the image on the right) and the CollisionShape and adjust.
Now that we have our player, let’s run the scene and see what happens. Press F6 to run the current scene.
You might notice that the player is over in the corner. This is fine for now since we’ll be placing it in another scene later. You might also notice that you can’t really do anything. Let’s fix that by making a script!
We create a script by clicking on the player node (CharacterBody2D) and pressing Attach Script. If you accept the defaults, it should create a ‘Basic Movement’ script and open the script editor. If you try playing the scene again, you should notice that the player now moves! Of course, it would be nice if they didn’t fall off the screen so quick. Let’s make something for them to walk on!
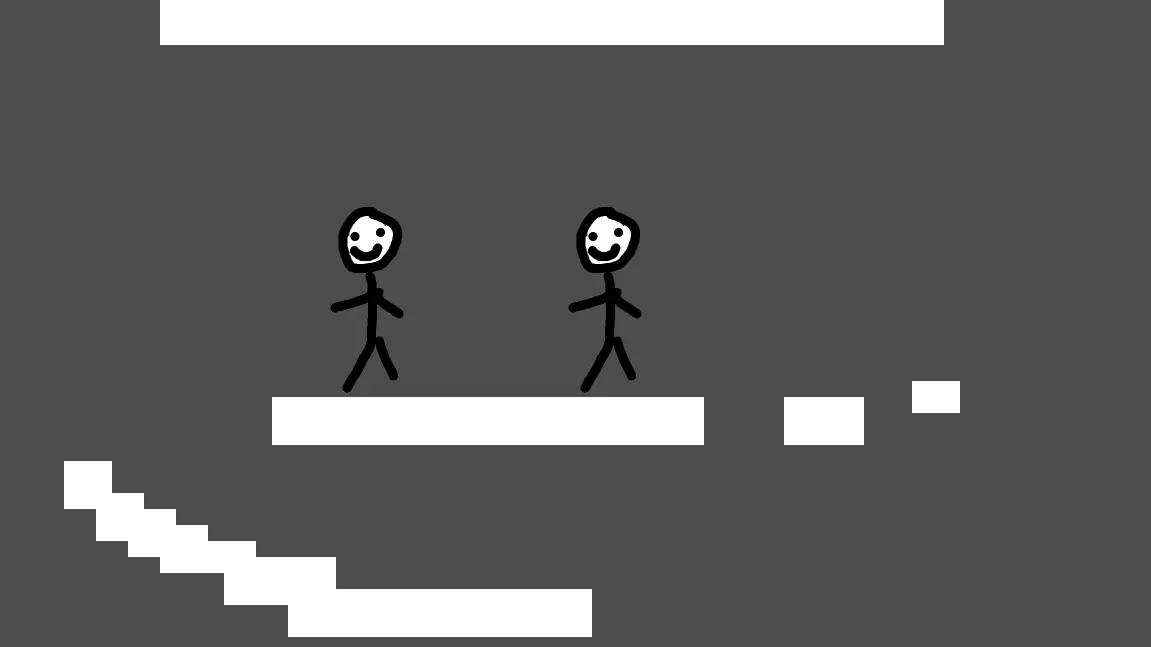
Making a level
Switch back to the 2D view and create a new scene (Ctrl+N) with a 2D Scene root node. If you drag the player.tscn file in, you can add it as a child of the root node. If you press the play button in the top right, you can select this as the main scene (save it to something like game.tscn) and play it (If you set the player scene as the main scene, right click on our new scene in the FileSystem area and set as main scene). The player should now be where you dragged them in.
Now let’s add something for the player to walk on. We don’t want the floor to move with the player, so we’ll make it a child of the root node too. We’re going to use a TileMapLayer for this, but a StaticBody2D would also work. TileMapLayers are an easy way to make grid-based 2D levels for your game. Add a TileMapLayer node and find a tileset online (or download this plain texture) to add to your project. Add a TileSet resource to the TileMapLayer in the inspector (this contains all the tile types for your level) and drag the image into the new TileSet area down the bottom to create the tile. Now if you click back into the TileMap tab down the bottom, you should be able to draw in the main viewport with your new tile. You can adjust the scale in the ‘Transform’ section of the inspector if need be. We still need collisions, so add a new physics layer to the TileSet resource in the inspector. Then in the TileSet tab in the bottom, switch to the Paint tool and select Physics Layer 0 as the Paint Property. Then, ‘paint’ the tiles by dragging over them - this assigns them to Physics Layer 0.
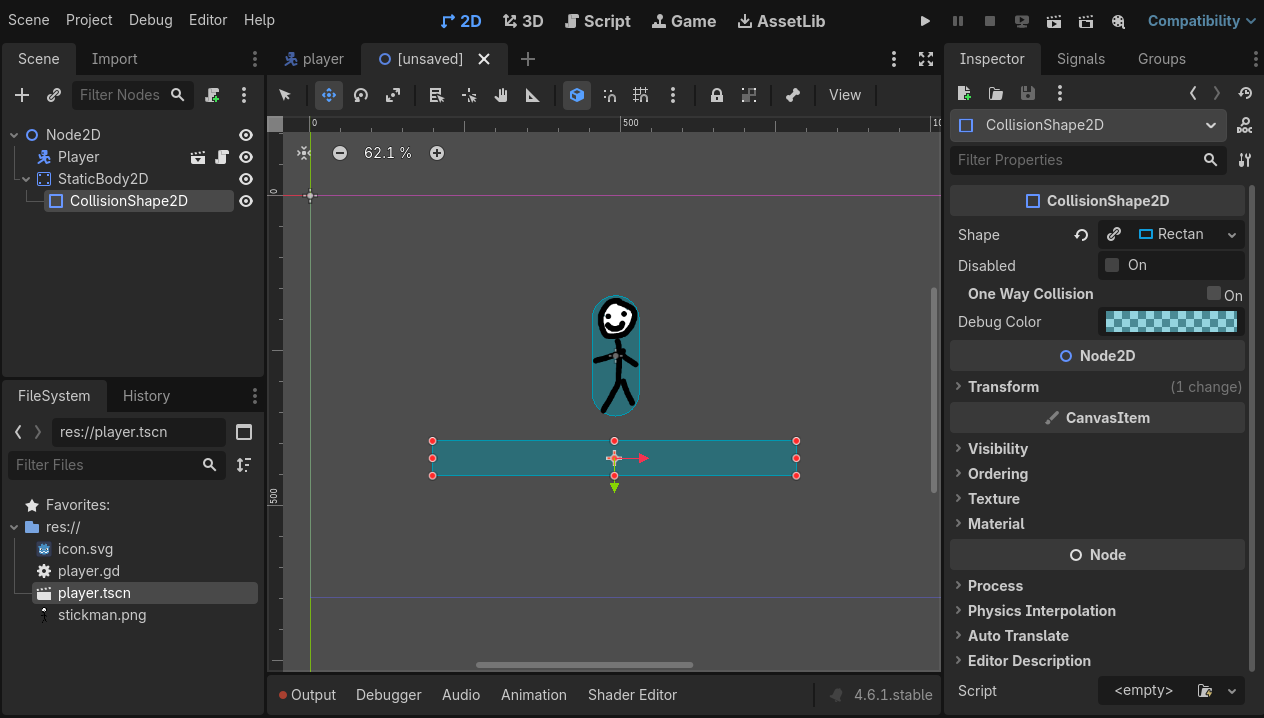
You should now notice that the player stops falling and you can now walk around! Once you’re done, let’s move on to poking at the player code.
Coding the player
Godot has it’s own programming language called GDScript. If you’ve ever used Python, it’s pretty similar. Lets take another look at the player script.
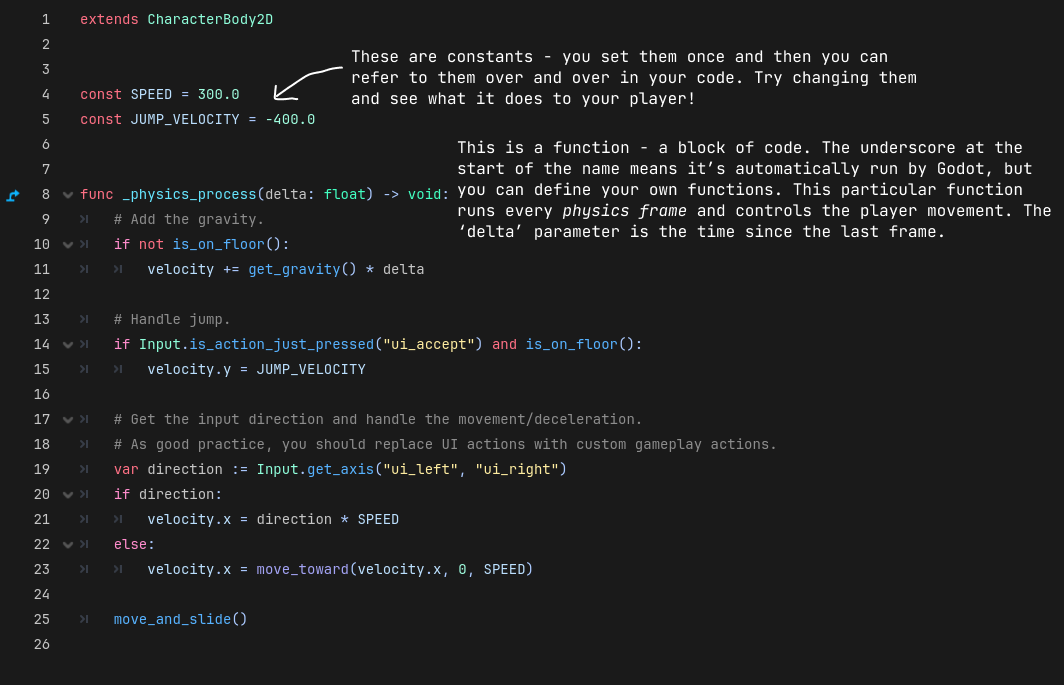
By editing this script you can code behaviours like double-jumping, health, attacks, movement abilities, etc - anything that ‘lives’ in the player. In this case, we want to be able to control each player individually using different keys. Right now, if you duplicate the player in our game scene (Ctrl+D), both players will copy eachothers movements. We need some way to store different information on each player.

Go ahead and add this line to your script after the constants:
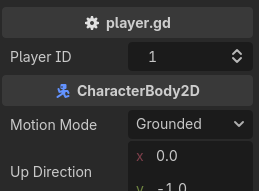
@export var player_id = 1This is a variable. Like the constants, it’s a way of storing data that can be referred to later, however unlike a constant we can change the value of a variable whenever. The @export annotation ‘exports’ the variable as a property in the inspector. You should be able to set the Player ID property in the inspector now. Set the ID of the other player to 2. Now we can reference this in our script. To show that this works, let’s make it so that only player 1 can be controlled.
Now only one player can move! But that’s not our goal. We need to bind each player’s movement to a different set of controls.
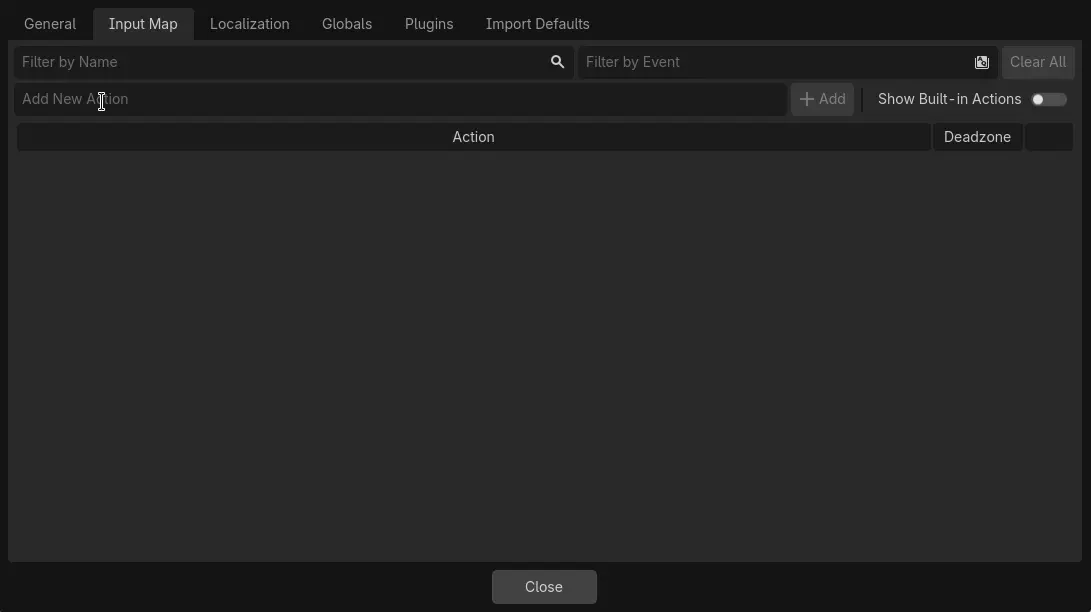
Godot’s input system
If you look at our player script, you can see there’s a few references to Input. This is Godot’s input system. Instead of handling keyboard and controller inputs yourself, Godot lets you bind inputs to actions (like jump or move_left) that can be queried by your code. Right now our script is using Godot’s built in UI actions, but we can create our own in the Input Map menu (Project > Project Settings > Input Map tab). In particular, we’re gonna make two sets of input actions, one for each player. The following GIF shows you how to create an action called player1_left thats bound the the a button.
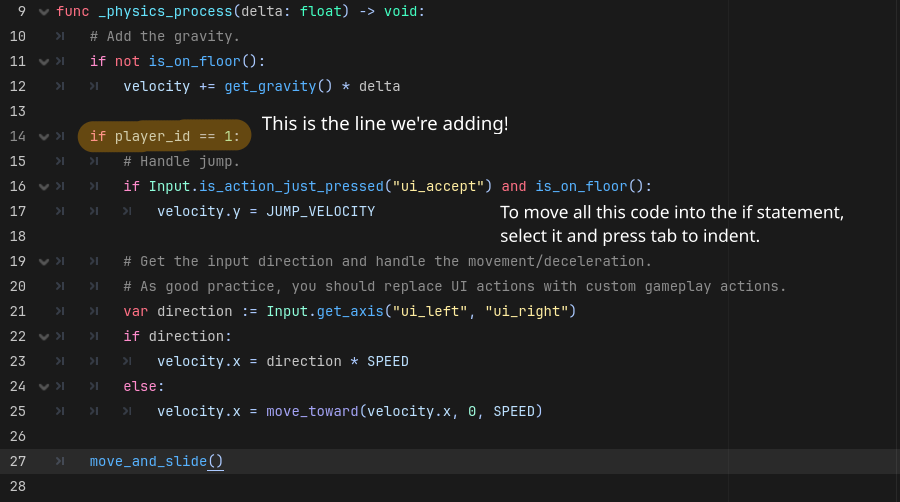
Add a left, right, and jump action with an appropriate keybind for each player. It doesn’t matter what format you follow, as long as you’re consistent and include the player id. By the end, you should have six actions. Now we need to change the actions being used in Input.is_action_just_pressed and Input.get_axis to a new action based on the player action. For example, jumping might look like "player" + player_id + "_" + "jump". This is a lot of code to write, so we’ll put in a function so that we can reuse it. Remove the if statement and add this to end of your file:
func player_action(name):
    return "player" + str(player_id) + "_" + name
This function takes in an argument (name) and returns a value - the name of the action we want to look up. Now we can replace the hardcoded action names with our function e.g Input.get_axis(player_action("left"), player_action("right")). Once you’re done, your code should look like this:
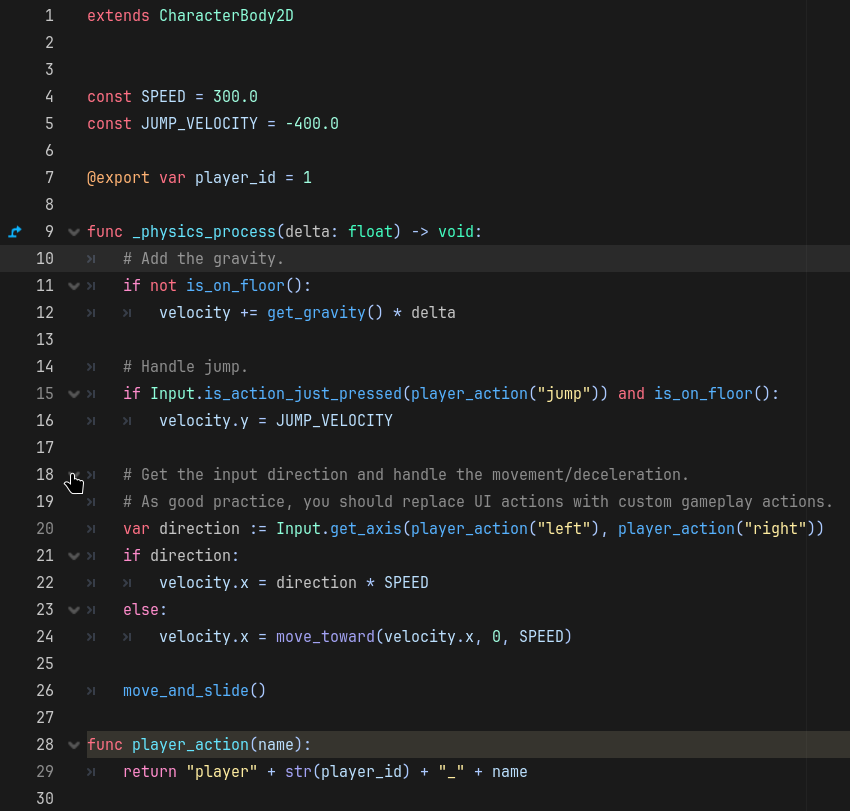
And now you can control each player individually!
Next steps
Your game isn’t done yet! Use what you’ve got so far as a base to build something unique and polished. Here’s a couple things you could try adding:
- Try adding different art or abilities for each player! You might need to have separate scenes or scripts for each player.
- Use the AudioStreamPlayer node to add sound effects or music (useful tutorial)
- If your level gets too big to fit on one screen, try adding a camera system using the
Camera2Dnode. - Try add hazards or objects that only apply to one player (if you want something that can only be walked on/through by one player, use Collision layers and masks)
Cool resources:
- Official Godot docs - The holy grail of Godot tutorials
- Learn GDScript From Zero
Publishing your game
In order to ship your project, it needs to be available for anyone to play. The easiest way is to export your project and publish to itch.io. To export your game, click Project > Export and then Add > Web at the top of the export menu. If this is your first time making a game in Godot, you’ll probably also need to install Export Templates.